This blog post is brought to you by the developer of BitBudget. BitBudget is an automated budgeting app for Android and iOS which syncs with your bank account and helps you avoid overspending. If you’d like to quit living paycheck-to-paycheck and get a better handle on your finances, download it today! https://bitbudget.io
As I mentioned in my previous post, I’ve been doing a little hacking today using the Realm Database for iOS (using Swift). The official tutorial from Realm is pretty good, but it leaves out where exactly to put certain snippets of code within the Xcode framework as many official tutorials for various programming frameworks and libraries often do. So I just wanted to jot down this quick blog post for my own personal reference, or maybe to help another developer out there in cyber-space to get up and running with the Realm Database for iOS:
- Install Realm using the Cocoapods Dependency Manager (See this tutorial for help getting started with Cocoapods if necessary)
- Create a New Xcode Project
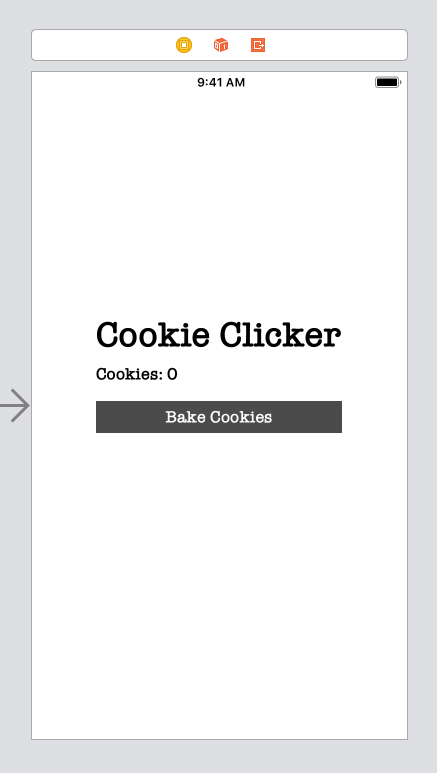
Okay, so now you have you have Realm installed and have created your new Xcode project. Now we are going to make our “hello, world” app inspired by one of the stupidest games of all time: Cookie Clicker
Cookie Clicker is a pretty ridiculous game. The gist of the whole thing is you click a button and then you get cookies. That’s it! Pretty much all there is to it. The only thing is, with Cookie Clicker, you want to be able to save the number of cookies baked in between running the game, so I thought it would make an excellent example for learning the basics of Realm. The app will simply consist of a single screen with a label which displays the number of cookies baked, and a button the user can press to bake more cookies. And using the magic of the Realm Database, we will be able to save the number of cookies baked by our users. In addition to the single screen, we will have one ViewController (ViewController.swift) and another swift file called Cookie.swift which we will use to declare our Cookie class. Just remember to connect the label to the view controller (control-drag) to create your IBOutlet for the cookieCountLabel, and also make an IBAction connection by control-dragging from your bakeCookiesButton to the ViewController.
NOTE: See my previous blog post regarding the error message “Could Not Build the Objective-C Module ‘RealmSwift‘” if necessary.

//
//  ViewController.swift
//  HelloRealm
//
//  Created by Christopher Pedersen on 2/25/19.
//  Copyright © 2019 Christopher Pedersen. All rights reserved.
//
import UIKit
import RealmSwift
class ViewController: UIViewController {
    @IBOutlet weak var cookieCountLabel: UILabel!
    override func viewDidLoad() {
        super.viewDidLoad()
        // Do any additional setup after loading the view, typically from a nib.
        let realm = try! Realm()
        let cookies = realm.objects(Cookie.self)
        let cookieCount: Int = cookies.count
        if cookieCount > 0 {
            cookieCountLabel.text = "Cookies: \(cookieCount)"
        } else {
            cookieCountLabel.text = "Cookies: 0"
        }
    }
    @IBAction func onBakeCookiesButtonClicked(_ sender: Any) {
        let realm = try! Realm()
        let newCookie = Cookie()
        newCookie.type = "Chocolate Chip"
        newCookie.size = "Large"
        let cookies = realm.objects(Cookie.self)
        try! realm.write {
            realm.add(newCookie)
        }
        let cookieCount: Int = cookies.count
        cookieCountLabel.text = "Cookies: \(cookieCount)"
    }
}
//
//  Cookie.swift
//  HelloRealm
//
//  Created by Christopher Pedersen on 2/25/19.
//  Copyright © 2019 Christopher Pedersen. All rights reserved.
//
import Foundation
import RealmSwift
class Cookie: Object {
    @objc dynamic var type = ""
    @objc dynamic var size = ""
}