Today, my boss asked me to try running our organization’s React Native app in release mode, something I had never done before. In all of my personal projects I would always run my React Native apps in debug mode, never actually testing a release version exactly. I would just follow the steps to create a release build and publish, never actually testing the release build until it appeared on the App Store.
So if you find yourself in a similar situation, here are some quick and easy steps to running a React Native app in release mode. Assuming you have Xcode configured to run the app on your personal iPhone:
- Plug your iPhone into your Mac
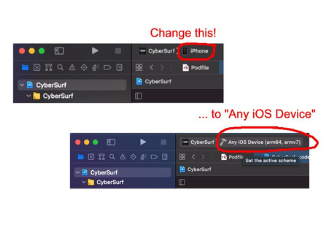
- Select your iPhone as the device run target
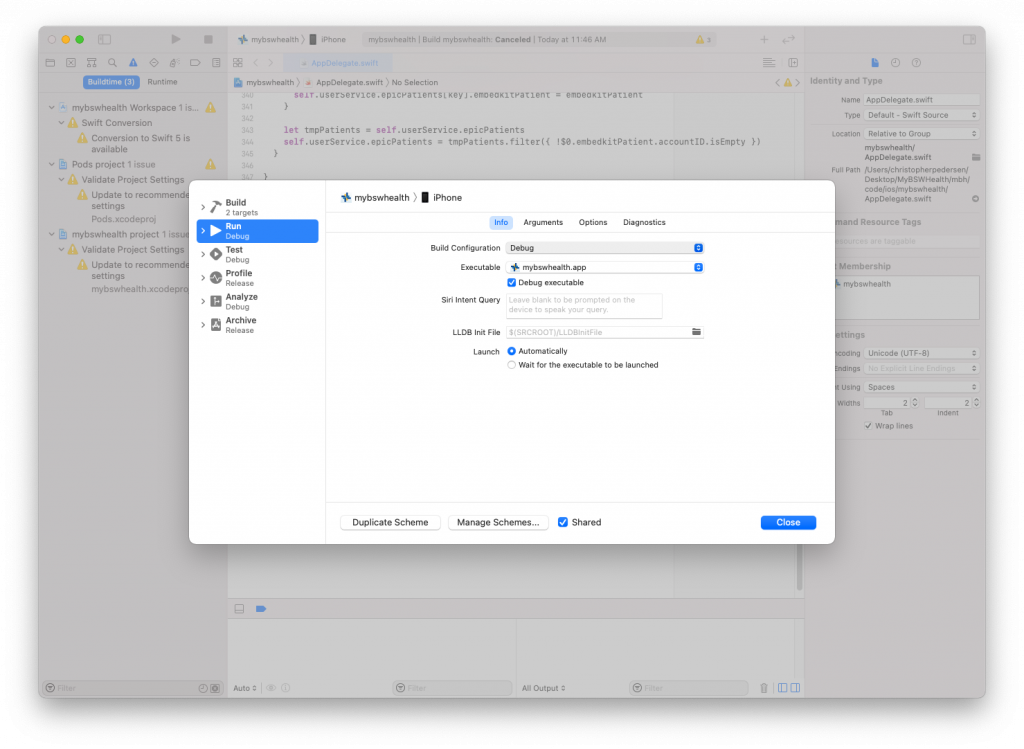
- With Xcode open, press/hold: COMMAND > SHIFT > COMMA on your keyboard
- A window should appear where you can select RUN > INFO > BUILD CONFIGURATION … and change DEBUG to RELEASE in the dropdown window (see screenshot below)
- Last, close the window and run your app
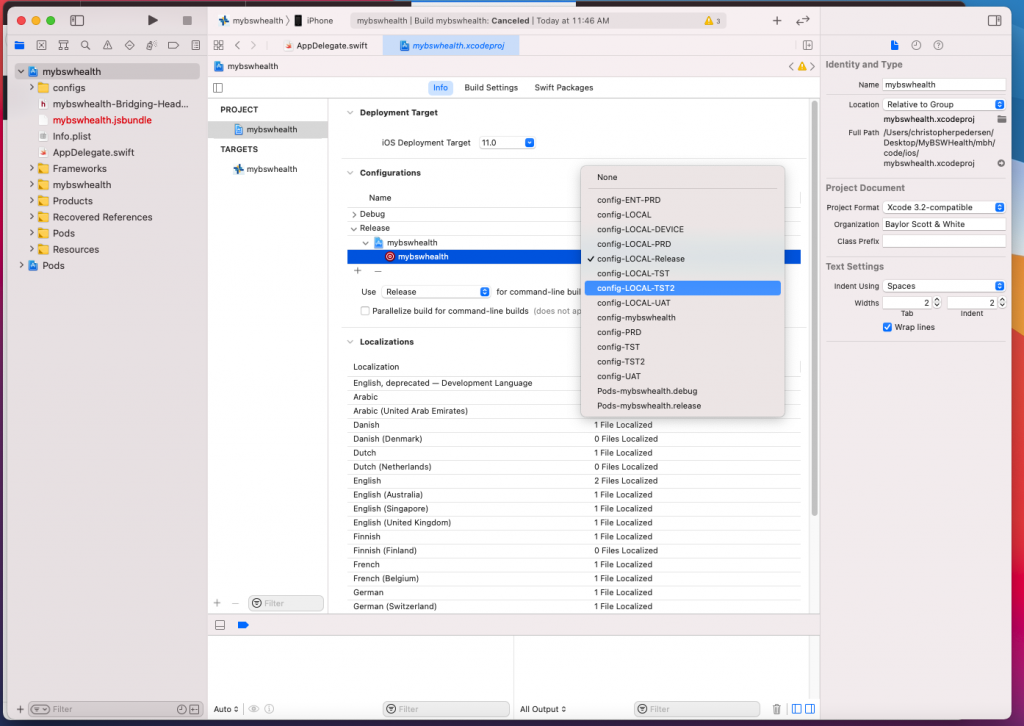
Note: If you are working on a large enterprise grade application, you may also need to change a config setting to point at your companies development servers if you want to test the release version of your app using development servers on the back-end with fake users and test data. Here’s a screenshot (mostly for my own personal reference) on how we do that at my organization: